If you prefer videos, watch the youtube video where we give you our top 5 tips that are guaranteed to change the way you do Root Canal Treatment from now on!
Tip 1: Endo frost your GP points!
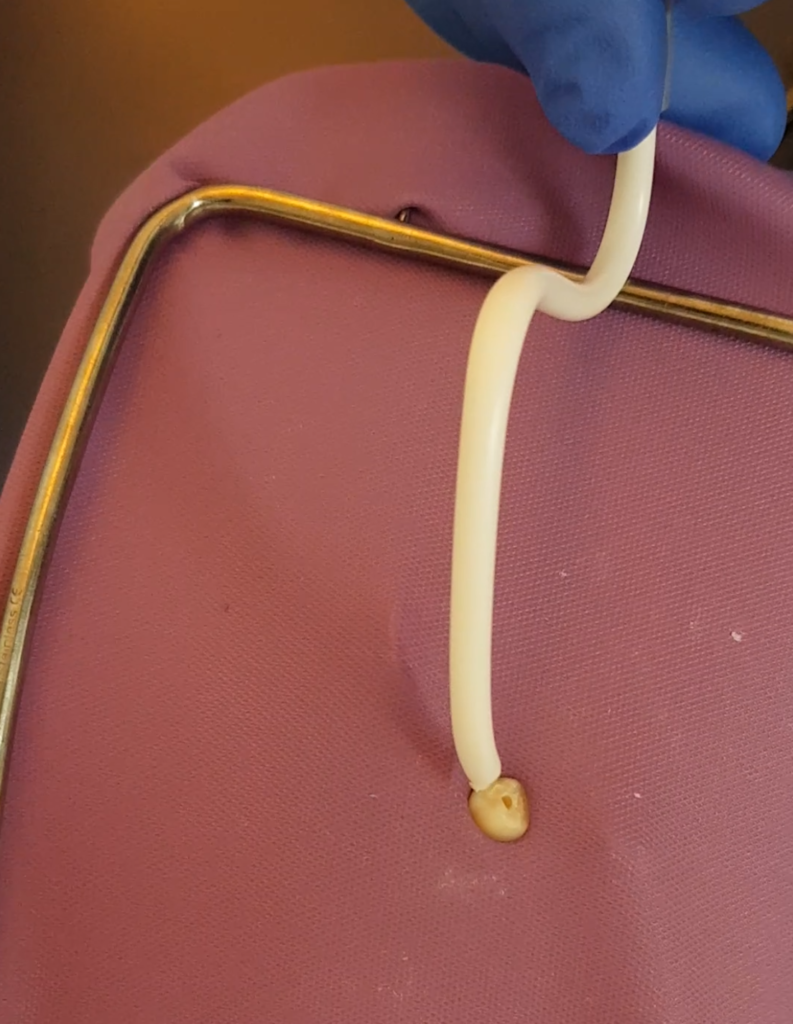
This first tip blew my mind when I was first introduced to it by an endodontist! So in my opinion the most difficult part of obturating with cold lateral condensation is getting all the accessory points in. They’re so thin and flimsy that every time I try to put them in they either crimple up or they don’t go down as far as I would like. So to make the accessory points tougher and more sturdy, ask your nurse to spray it with endofrost or pharmethyl and then put a thin coat of sealer at the tip. The endofrost makes it freezing cold and when you put the sealer on it is gets stiff, so you can easily slide it down the canal without it crimpling up! When I started doing this, I found it so much easier to get the points down the canal and I could fit way more in!

Tip 2: Make your own surgical suction!
So the second tip is to make your own surgical suction! So we all know ideally you use a small surgical suction tip to aspirate sodium hypochlorite but you might not have these where you work. So instead, you can actually make our own using the curly saliva ejectors! You can use some scissors to cut them, it can be a bit fiddly to cut because of the wire inside but just twist and turn it and it will separate! You want to get this suction as close to the pulp chamber as possible so you can suction the hypochlorite before it leaves the pulp chamber so there’s less chance of the hypochlorite leaking into the patient’s mouth through the rubber dam.
Tip 3: Use different types of files for WL radiographs!
This third tip will help you when taking your working length radiographs. Especially with molars there are multiple canals and when you take your working length radiograph you could have three or four files in there and sometimes it can be tough to know which file is in which canal. An easy way to differentiate, is by putting a different file type in each canal. So for example, for a lower molar, it can be difficult to distinguish between the mesiobucal and mesiolingual canals, so put a k-file in one and a hedstrom file in the other. It doesn’t matter what you put in the distal canal because it will be obvious. Then take your x-ray and on the x-ray you will see the different flute shape on the files and you’ll know which is which. If you don’t have different file types, or you want to differentiate between three canals for example on an upper molar, you could use a different size file instead.
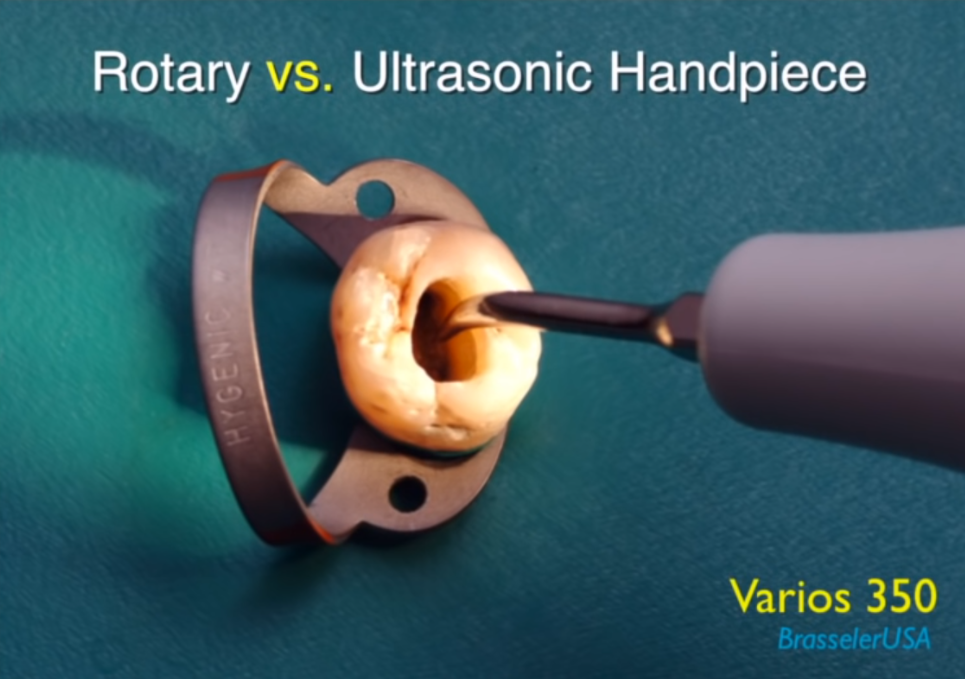
Tip 4: Use an Ultrasonic!
So our fourth tip is to use your ultrasonic scaler to it’s full potential! We could make a whole video on the use of ultrasonics in endo because there are so many, but here are a few ways it can make your life easier! Think of your ultrasonic as a safer slow handpiece with much better vision. You can use it to remove dentine when you’re searching for canals and it’s much better than the slow handpiece because you remove dentine in smaller increments with much more control and you can see better since the tip is very thin, whereas a slow speed handpiece blocks your view completely! It’s also the best way to remove pulp stones and pulp tissue when used in combination with sodium hypochlorite. And lastly, you can use it initially to open up your canal orifice!
Tip 5: Remember the little things!
So our fifth and final tip is to use the things around you wisely. So you know that endo takes long and the patient has to keep their mouth open for a long time, the worst thing is constantly having to ask your patient to open their mouth wider. So give them a mouth bite prop to bite on throughout the endo. It makes it so much more comfortable for the patient as it gives them something to bite on and their mouth won’t slowly close every other minute. Another thing to use around you is your rubber dam, instead of constantly handing back the apex locator tip to your nurse when checking for working length, just clip it on to the rubber dam, adjust the file and then just pick it back up. This saves so much hassle and time. And finally, when you’re using an endo ring with a sponge, instead of getting your nurse to put the glyde paste or calcium hydroxide on a pad, get them to put it on the edge of your ring. So you can just coat your files with glyde straight away without having to ask your nurse for the pad.
Check out our other content
If you’re interested, feel free to check out our other Blogs, our Instagram page, or our YouTube channel for more.